Merry Christmas 2014

I’ve been holding off from my usual practice of posting my Christmas card, as I was late getting it out, and I like for the physical cards to arrive before the virtual card appears here. But now I’m up against a deadline again, with only two days until Christmas day, so I need to pound out a blog post.

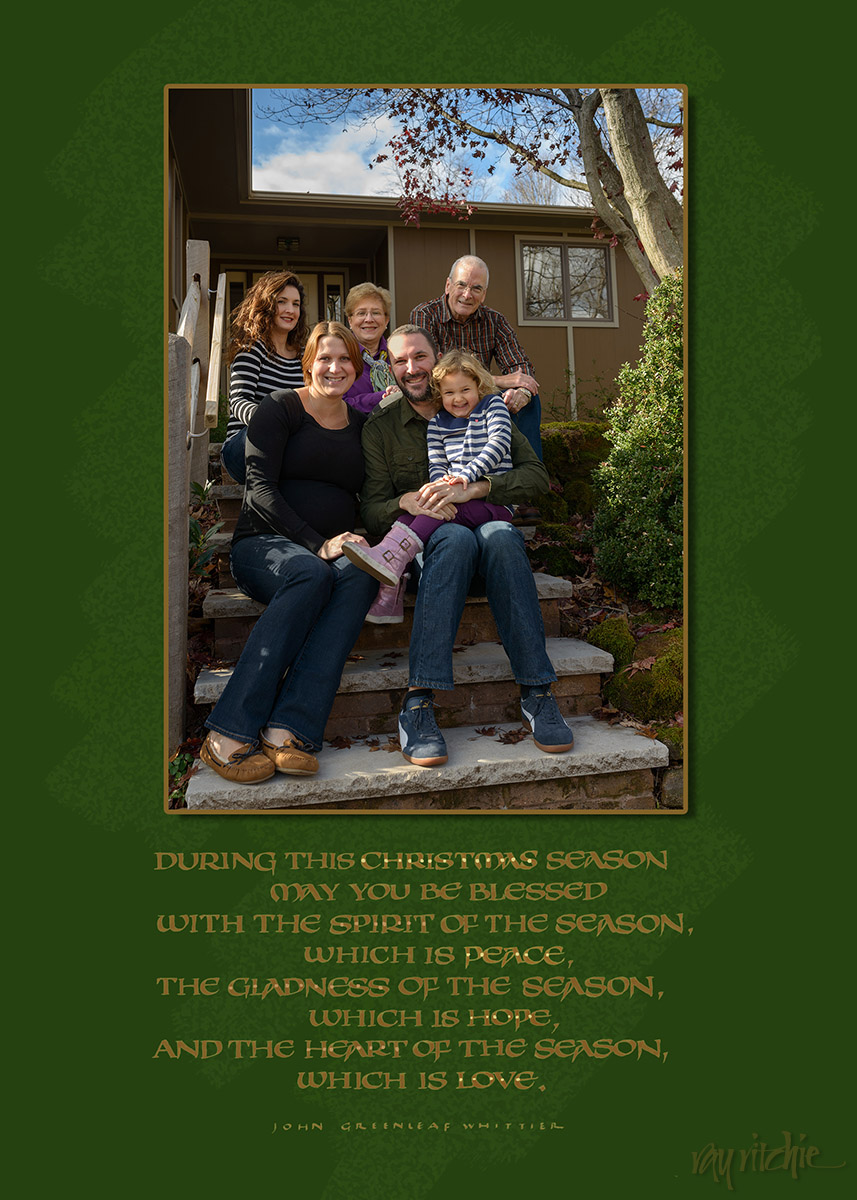
I’ve been doing these calligraphic cards for probably thirty years or more now, and they’re usually dominated by the calligraphic design. But for several years, we’ve also included a family photograph with the mailed cards, so Anita asked if we couldn’t have a family photograph card this year. The family was all here for Thanksgiving, so we bundled up, posed ourselves on the front steps for the camera on the tripod, and then quickly threw off our coats and hid them behind us while I ripped off a quick sequence of a dozen or so shots with the remote. As usual, each individual person looked their best in a different shot, but we all seemed to agree on one as the cutest overall, thanks mostly to Anna’s expression.

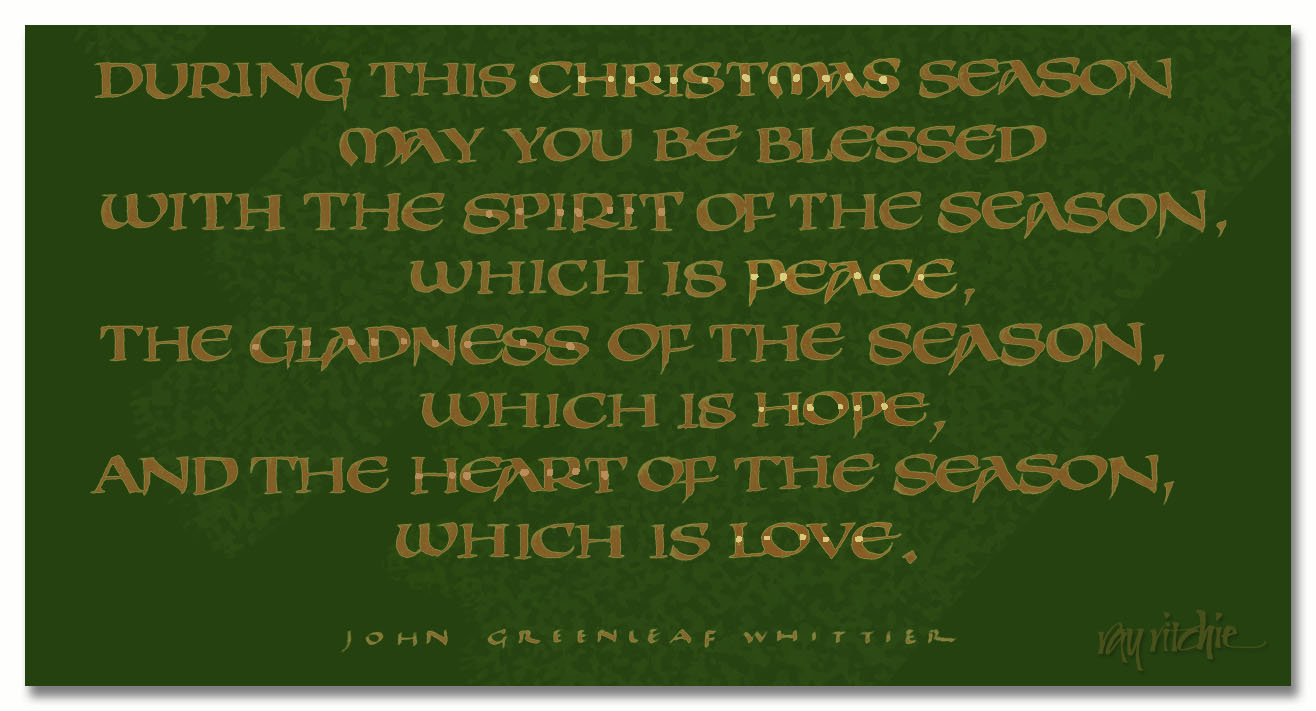
I added a quote from John Greenleaf Whittier in a modernized version of medieval “artificial uncial” calligraphy below the photo, created a quick background in Photoshop, and then sent the whole thing off to Shutterfly for printing – also a change for me, as I’ve usually done all the printing myself. Here’s the card front:
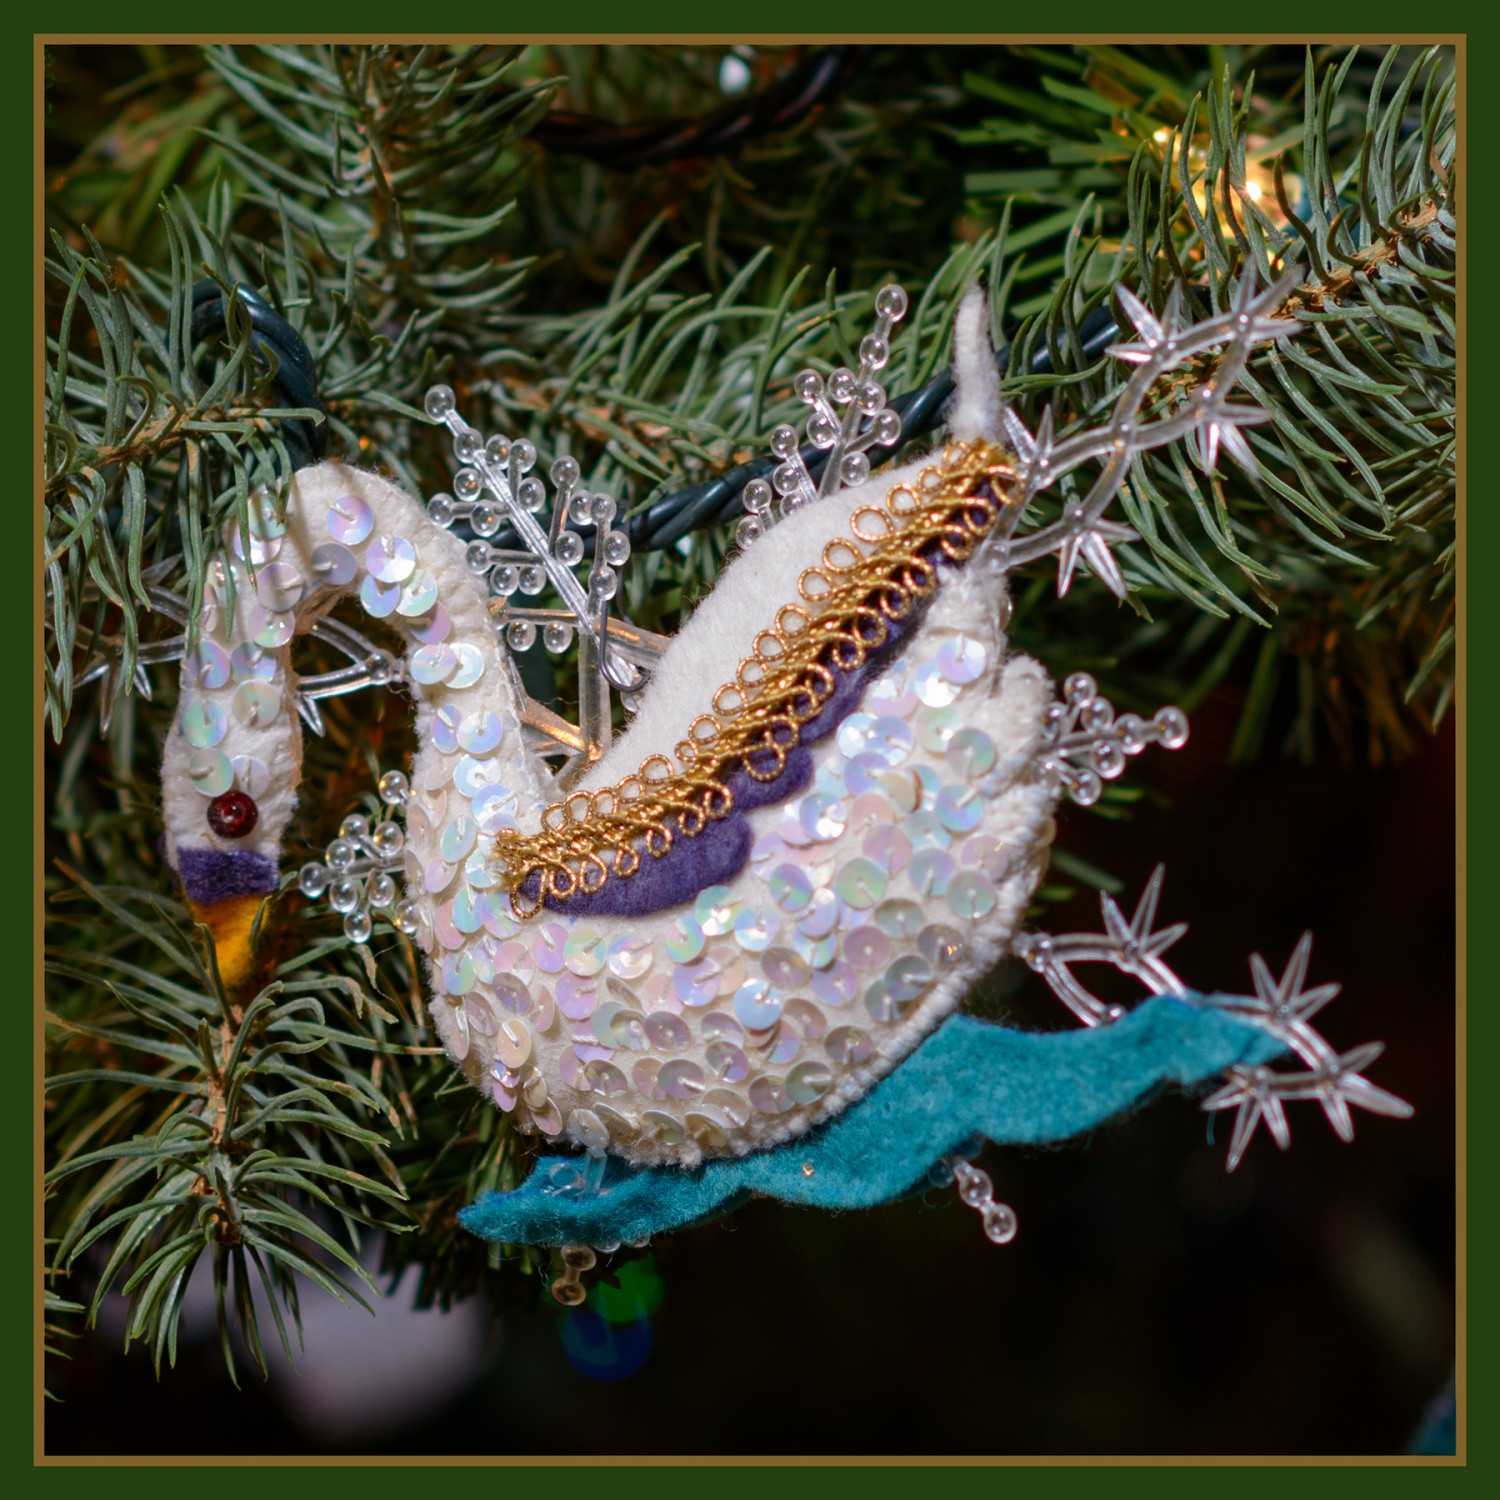
Since the Shutterfly templates allow a small image on the reverse side of the card, I decided to include a tiny image of one of our “12 Days of Christmas” tree ornaments that Mom made for us over a period of several years. Here’s the “Swans a-swimming” ornament I used: and here’s a bigger crop of the calligraphy, for those whose interest runs that way:
Here’s wishing you all the blessings of Christmas, and a wonderful 2015.

========================= Technical Notes ===========================

This style of calligraphy is a little more difficult than some forms of uncial, as it uses a fair amount of pen-twisting and skating on the corners of the nib. You may notice that not all the downstrokes are the same width – that’s deliberate, but since uncial is normally written with the nib held almost horizontal, to get a thinner downstroke, you have to twist the nib quickly from horizontal to a more vertical angle as you move it down. In the case of the downstrokes of the N’s, it’s twisted completely vertical almost immediately. To get the little triangular serifs on the T’s I used a quick counter-clockwise flick on the left corner of the nib for the left serif, and then after the horizontal stroke, a clockwise flick on the right corner for the right side. A somewhat similar technique is used for the serifs on the lower left and upper right of the S’s.

You may also notice that there are two forms of A’s in the quote. Most of the A’s are an older form typical of lettering from the 1500′s, but at the beginning of the penultimate line, I used a more modern, conventional form. I did that just because the word “And” is relatively unimportant, and I didn’t want the eye to pause there as much.

Both photos were done with the Nikon D800. The family photo was done with a Sigma 35mm f/1.4 lens, and the ornament with the 85mm f/1.4G.

Recent Callidoodling

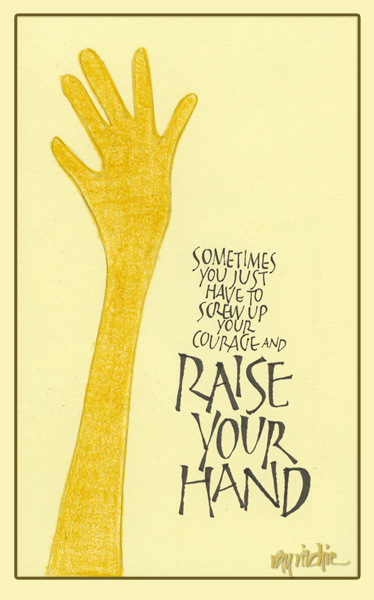
I’ve posted several times in the past about my doodling in church, which I’ve come to refer to as “callidoodles.” I don’t really do this as a tool for generating design ideas – it’s more of a form of meditation, or distracting one side of my brain while the other continues to work. But once in a while, some promising ideas do emerge, and since I haven’t posted much this year, I have a pretty big stack of callidoodles that I haven’t shared. Here are a couple of recent ones.

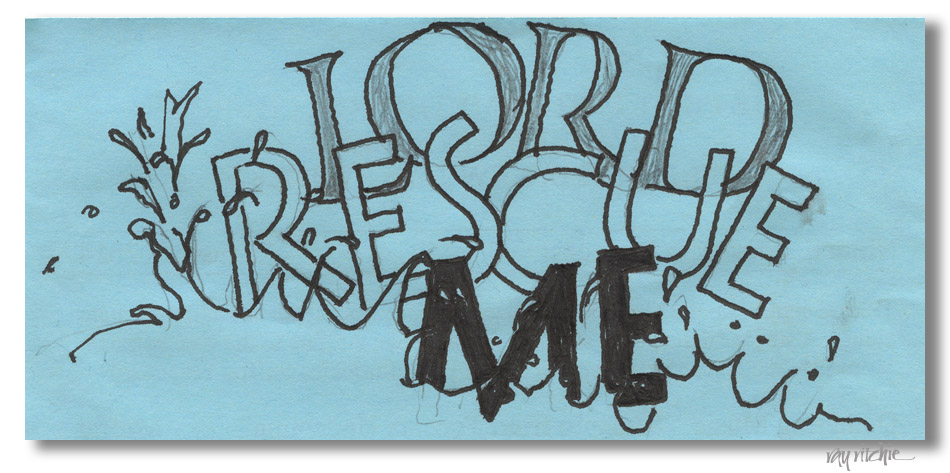
A lot of my doodles involve incorporating some sort of small picture or graphic with lettering, like this:

I liked that doodle for the clean lines of “Rescue Me” against the more classical Roman form of “LORD,” as well as the way the breaking waves of water work around the letters. I think it could be re-worked in more finished form by using some Photoshop effects to generate the splashing water, and perhaps adding some 3-D effects to the letters.

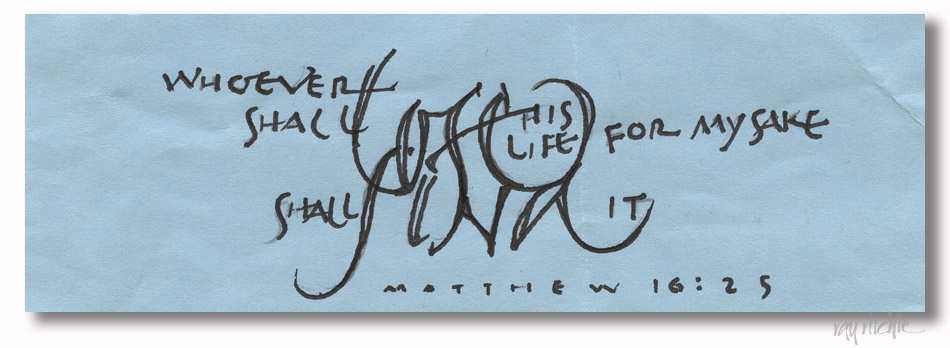
In other doodles, I occasionally find that a new calligraphic design just pops out of my subconscious:

It’s not unusual for me (or any calligrapher, for that matter) to use a “liaison” in joining two or more letters in my calligraphy, but in this case, there are actually seven letters involved, which is much more complicated that I would ordinarily attempt: the bottom of the “L” in “lose” forms the crossbar of the “f” in “find,” the “s” in “lose” also forms the left-hand stroke of the “N” in “find,” the exit stroke of the “e” becomes the ascender of the “d,” and the dot over the “i” in “find” also becomes the crossbar of the “e” in “lose.” If I had been consciously attempting this, I don’t think I could have pulled it off, but somehow, as I was just doodling without attempting to be “successful,” I managed to do it. I think it’s an interesting idea for a design. And lifting up the two words “lose” and “find” and tying them intimately together works for interpreting the scripture quote as well.

I’ve been asked to put together some of my calligraphy to be used as graphics on our sanctuary video projection system for an upcoming worship service (date to be determined), and I’m thinking I’ll try to do some finished versions of some of my callidoodles; these two will probably be used, if I can pull them off once the more careful and cautious parts of my brain get involved.

Best wishes, Kelly and Zack

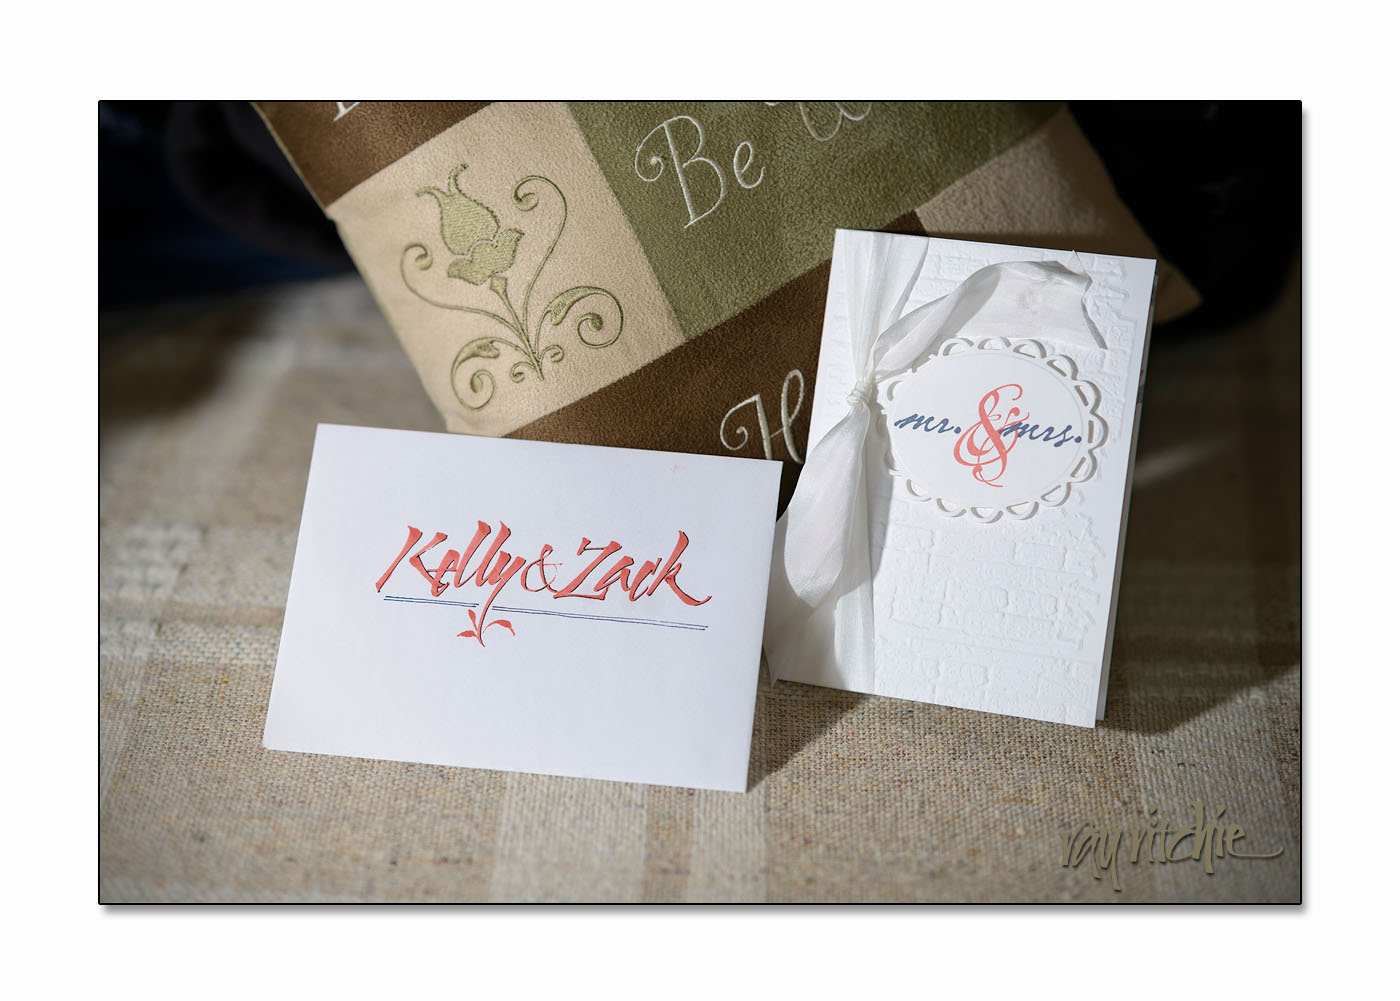
My nephew Zack married Kelly yesterday. I took lots of photos, of course, but I wasn’t the official event photographer, and I will save most of those for family and friends. A couple of items, though, are directly related to my themes here, so I will share those. As she always does for family, Anita made a handmade card to express our best wishes to the couple. Here’s her card, along with my envelope:

The card is done with stamping, embossing and die cuts, and is, I think, a new design for her. The envelope was done with a felt-tip brush marker matching the ink used for the ampersand of the card design; the coral color was from their wedding theme colors, selected to emphasize the beach location.

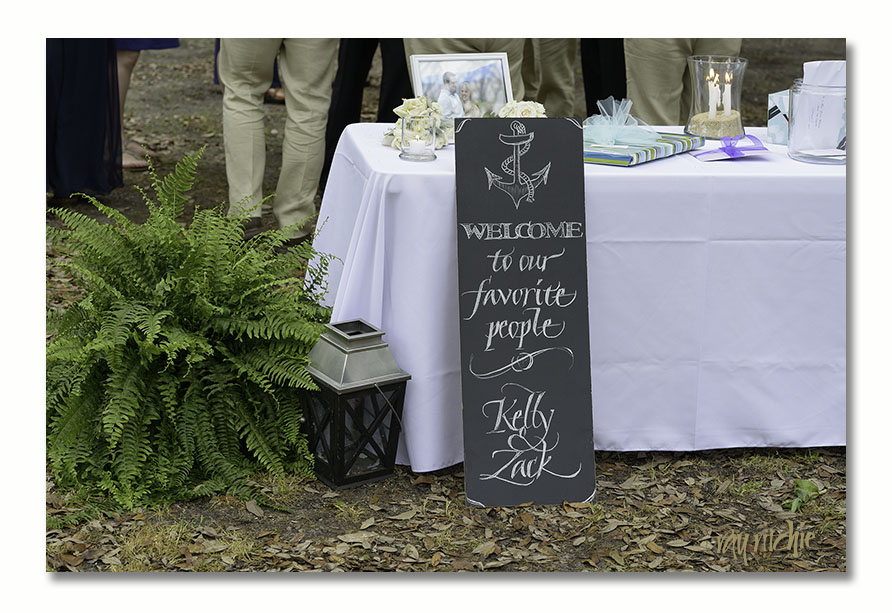
After we arrived on the Outer Banks of North Carolina, Kelly brought me a chalkboard and asked me to write a greeting for their guests at the reception. This was just a quick off-hand design, but I was fairly happy with the way it came out:

Since I was working on-site with no tools, we improvised to deal with the changing weather (rain was forecast, although it didn’t happen) by spraying the board with hairspray to keep it from smearing and give it a bit of waterproofing. The anchor design and the style of lettering in the word “Welcome” were chosen to match parts of the wedding program.

It was a beautiful wedding and a great party. The family is still basking in the afterglow, and I was glad to be able to be a part of it all.

Best wishes, Kelly and Zack!

Merry Christmas 2012

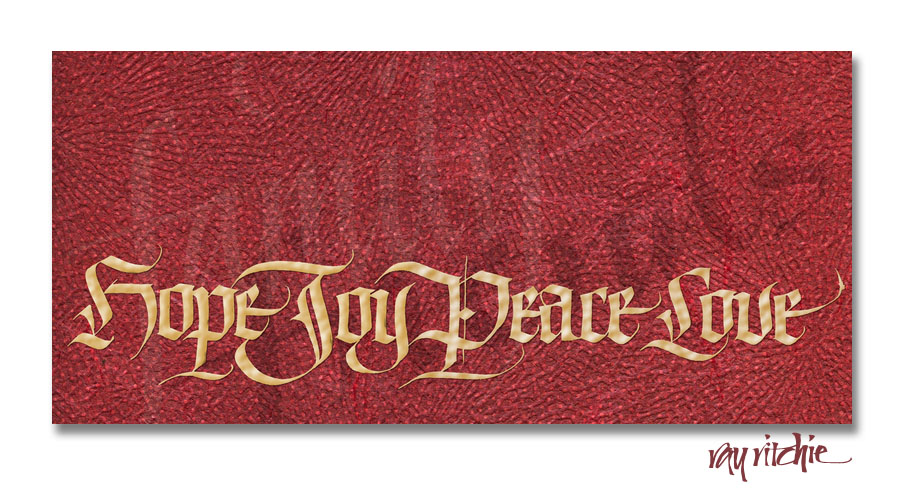
I have probably been designing our Christmas cards for at least 30 years now, and just finished the design, printing and envelope addressing for 2012 (possibly excepting a few last-minute additions to our list).  I usually struggle with picking a text until it becomes clear that I have to make a decision and get on with it. After the devastation of Tropical Storm Sandy (the U S Weather Service apparently has decided it was no longer a hurricane when it hit us), my dominant feeling was simply gratitude – for having come through with no lasting damage or injury, for friends who helped us so much when we were without power, water, and heat, and for our family, who let us know we were cared about. After a lot of searching for a quote that had notes of both gratitude and Christmas, I again found myself up against deadlines, and decided to go with a traditional set of words for the Advent season – Hope, Joy, Peace and Love. These are usually the themes represented by the candles of the Advent wreath. Our adult class at church had been doing an Advent study centered around these themes, with the title “Christmas Gifts That Don’t Break,” so I wove “family” and “friends” into the background of the card design, and Anita and I decided on the inside text of “Wishing you gifts that last.”

Here’s the final design:

 As I usually do, I began the card design by doing the main lettering in black and white. When I first started thinking of the Hope-Joy-Peace-Love theme, I tried a number of different styles and layouts of letters, but none of them were working for me. So I took a break and started reading a recent issue of Letter Arts Review, which had some very fine examples of Blackletter and Fraktur. Seeing those, I knew immediately I wanted to do the words in some form of Blackletter, and for some reason, I knew they would run across the entire bottom of the card. I really had no idea at that point as to what the rest of the design would look like.

Using Blackletter was for me an unusual choice, as I don’t do much of it. I had taken a multiple-day workshop on Blackletter styles with Julian Waters several years back, though, and he’s one of the best in the world at this hand, so I felt reasonably confident that I understood enough about it to make it work if I took the time to dust off some of my cobwebs. I went through probably a dozen or more renditions before I got one that I liked. As I started to close in on getting all the letterforms more or less the way I wanted them, I marked up each draft with corrections and laid a sheet of thin layout bond over it so that I could adjust the next draft to correct the deficiencies of the previous one.

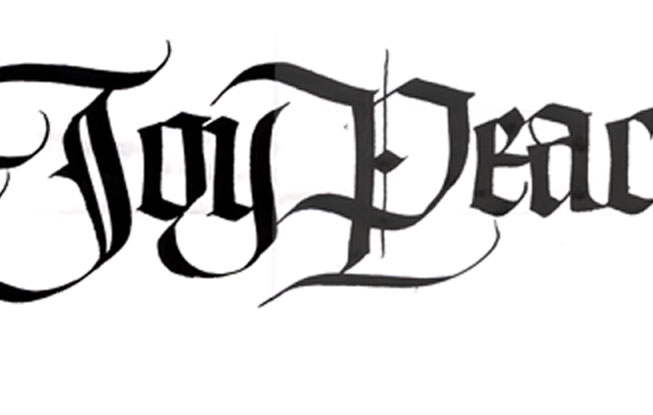
I did the lettering with a large Automatic pen (that’s a brand name, not a description of some magical powers in the way the pen works) and black gouache, which is my favorite writing fluid. In this case, the original letters were more than an inch high. Working large makes it much easier for me to see where I’ve made mistakes, which is important when I’m using a style I’m less comfortable with, and when I finally get the letters right, reducing them in size for the final reproduction makes them appear sharper and smoother than they were actually written.

Here’s a sample of near-final headline letters at close to their original size:

I next quickly wrote a couple of versions of the words “friends” and “family” in my usual Italic style, thinking that I would work them into the piece somehow, but with no specific idea of where they’d be used.

I needed a background, and I didn’t have an idea for an illustration, so I decided I’d just try to invent a texture. Going through my stocks of papers, I came up with a couple of unusual handmade Japanese papers that seemed like they might work. One was a brilliant red with a sort of radiating pattern of ridges and wrinkles, and the second was a translucent white with circular patterns of opaque white dots. I stacked the second paper on top of a sheet of pale green, just to make the white dots stand out more, and scanned the paper designs and the lettering into Photoshop. Once I had them stacked as layers in Photoshop, I decided the red was too brilliant, and would be hard to reproduce in print, so I toned it down with a touch of brown and orange.

After playing around with “family” and “friends” in the layout, I finally decided to bleed both words slightly off the page and orient them diagonally, so that neither was entirely revealed. I also cut back the opacity of these words so that they became only faintly visible – mostly I was using them as additional texture, and I wanted people who noticed them to think a little about what they said, rather than being able to immediately read them.

After I finished the design, Anita suggested that we add a small rhinestone on top of the diamond shape in the “P” of “Peace,” and I thought that touch of sparkle and dimension really added a lot.

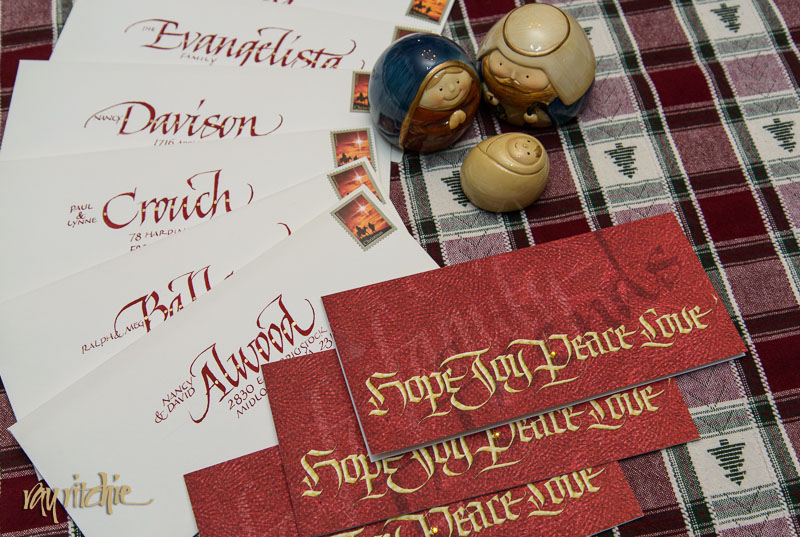
The envelopes were addressed in large red letters matching the card color, and coincidentally, I was able to find a Christmas postage stamp that had some of the same red-orange tones in it. Here’s a shot of some of the completed envelopes along with the cards – if you look closely, you’ll see the rhinestones I mentioned above:

 Here’s wishing you all gifts that last this Christmas and throughout 2013!


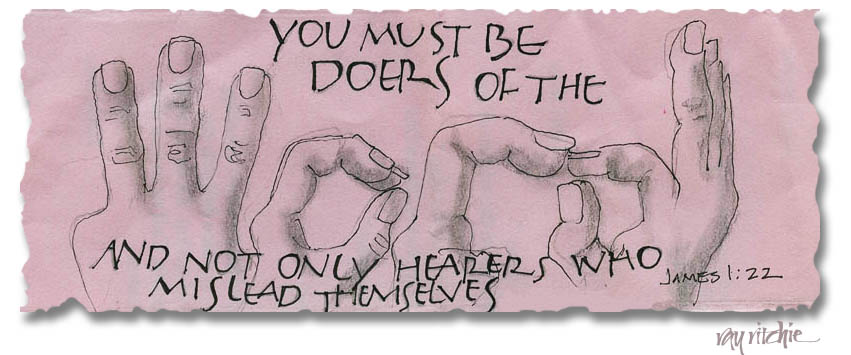
Doing the Word

Pastor Ramon returned from summer vacation, and this was the scripture text for the sermon, as seen in this week’s callidoodle:

I’m not sure whether the intended interpretation comes through in the drawing above, or even whether it comes across as “Word.” I would appreciate some feedback on that. I do sometimes like illegible calligraphy, but in these little callidoodles, I usually intend for them to be quickly readable. I’m thinking of doing the hands photographically  for a more polished graphic.

I’ll have some more callidoodles to post in the next couple of weeks.

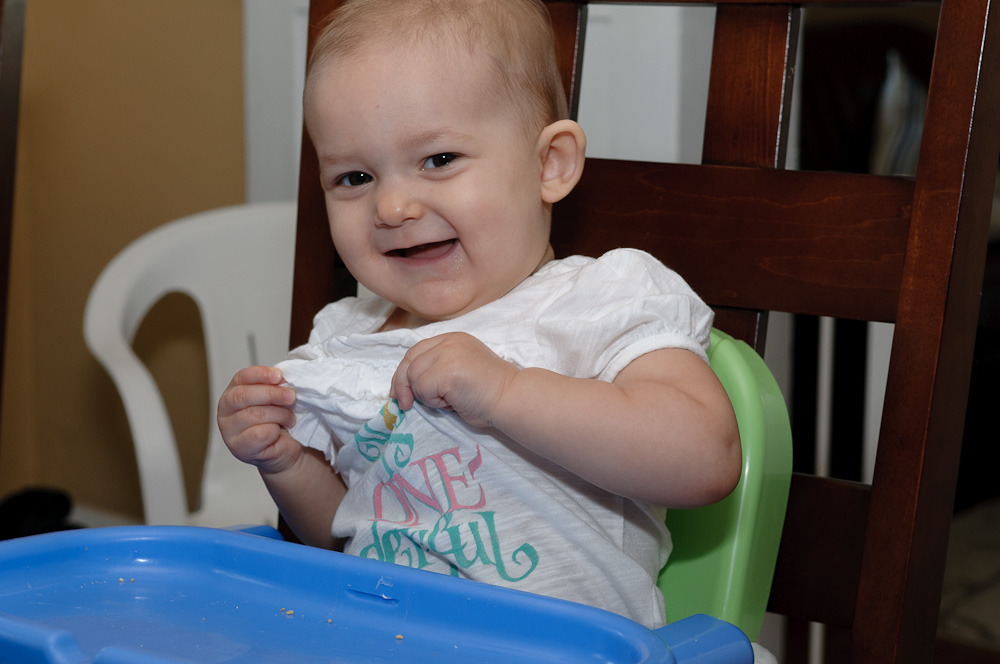
One-derful

Our granddaughter, Anna, just turned one last week, and we went up for an extended weekend to join in the celebration. Anita thought Anna would need a special shirt to mark the occasion, so she found a plain white ruffled blouse and asked me to decorate it with some appropriately celebratory lettering. Here’s the finished product:

Anna probably doesn’t appreciate the words – but her parents seemed to like it, and Anna put on a nice display of cuteness for us while wearing it, so I’ll choose to think she liked it, too.


What’s in a name?

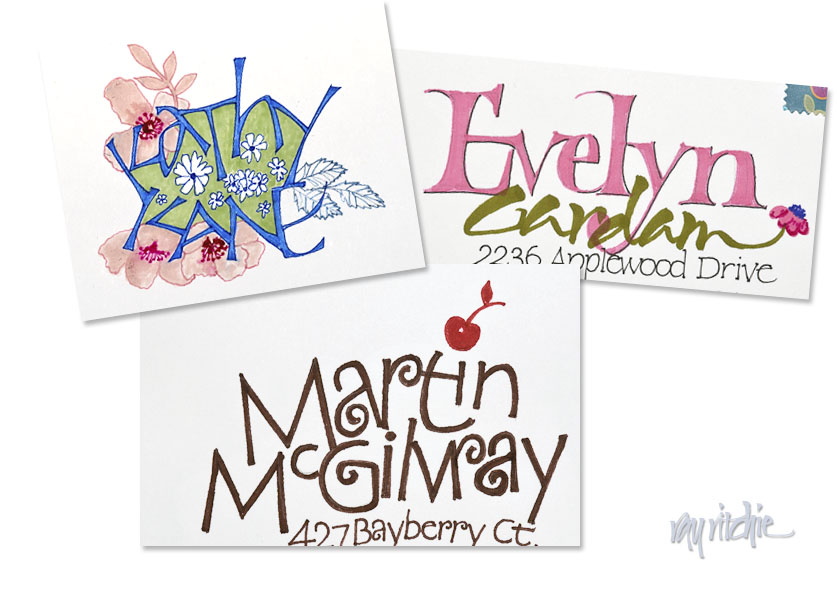
I haven’t done much finished calligraphic work for awhile, but Anita’s constant flow of cards always require envelope addressing, and that keeps me somewhat in practice. Here’s a recent sampling of three names with different treatments:

These envelopes are almost always done with brush markers and/ or fine Zig Micron pens. I enjoy doing them because they give me a chance to experiment with lots of different styles and ideas. The color and decoration scheme usually take their cue from the card design, and the letterforms are sometimes related to the forms used on the card, if I like the style. In the three cases above, Kathy’s envelope has letters that are my own design and unrelated to the card, but the decorative floral treatment is a take-off related to the card design. Martin’s envelope has lettering similar to that on the card, but I’ve changed the weight of the monoline forms, and added tilts and curves that weren’t in the typeface on the card. The cherry over the “i” in “Martin” is from the card design. Evelyn’s color scheme is the same as the card, and the small flower at the end of her name is related to the card design, but the letterforms themselves are my own, and are completely different from the card lettering.

My general rule with these kinds of envelopes is that I put my emphasis on color and design, but don’t try to hold myself to a “finished art” standard, as that would probably at least double the time required. I try to push myself to try something new as often as possible, but I do find that I develop certain formulas that I like and I re-use them fairly often, especially when I’m faced with a stack of cards that need to go out quickly. I rarely take the cards to my drawing board in my office/ studio, but usually just do them on a lapboard in the den. I only allow “do-overs” when I make an irretrievable error, so some of my envelopes please me much less than others – luckily, though, my audience for these is pretty uncritical and appreciative.

African Masks and Illuminated Letters – Addendum

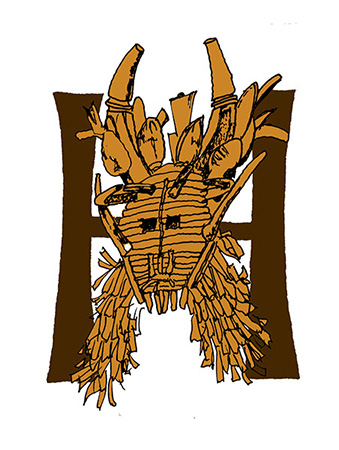
Since the previous post, I’ve played around a bit with constructing various illuminated letters. As I indicated in the first sketch of the previous post, I originally was thinking of using these designs as stand-alone letters in an informal envelope design, and I still think that’s probably the way I’d most likely use them. But I can conceive also of using the masks and other African art designs to decorate an initial letter of a block of typeset text or classically lettered calligraphy. In this case, we might want to superimpose the art design on top of a simple, strong form, to avoid competition between the complex details of the artwork and the lines of the letter – maybe something like this:

Obviously, we could use other letterforms for the background capital – uncial, classical Roman, a modern Versal form, etc. – the form above is just an example.

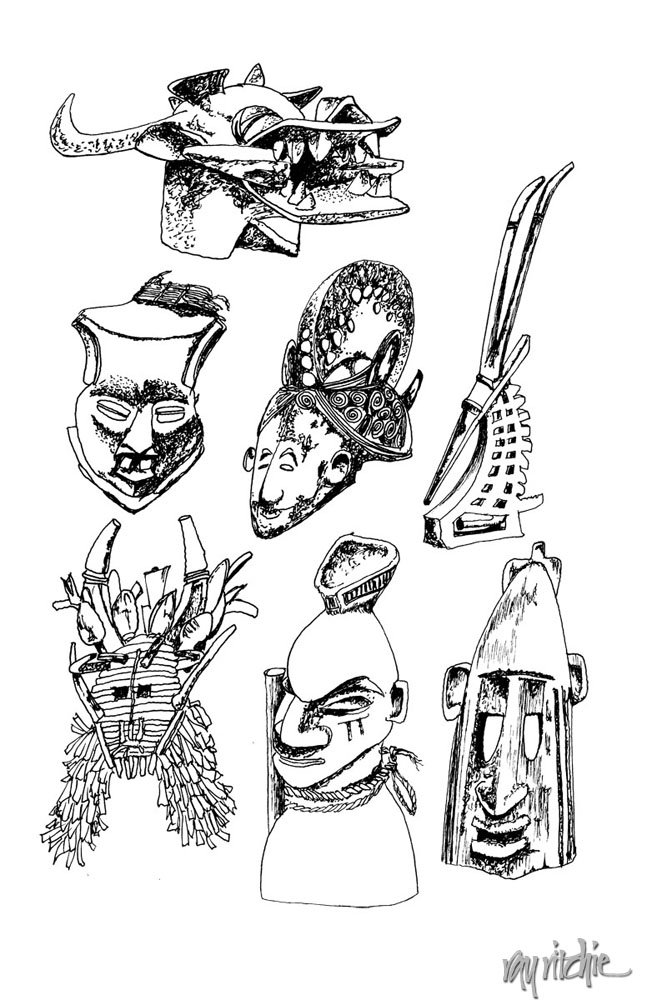
Yesterday I got into sketching more of the African art designs based on photographs in my library – here’s the collection so far:

I’ve got a few more photos in my library yet to sketch, and then I need to find some more sources. A friend mentioned to me yesterday that she has a collection of African art objects in her home, so I’ll try to arrange to take a look at that in the near future.