Cards and envelopes

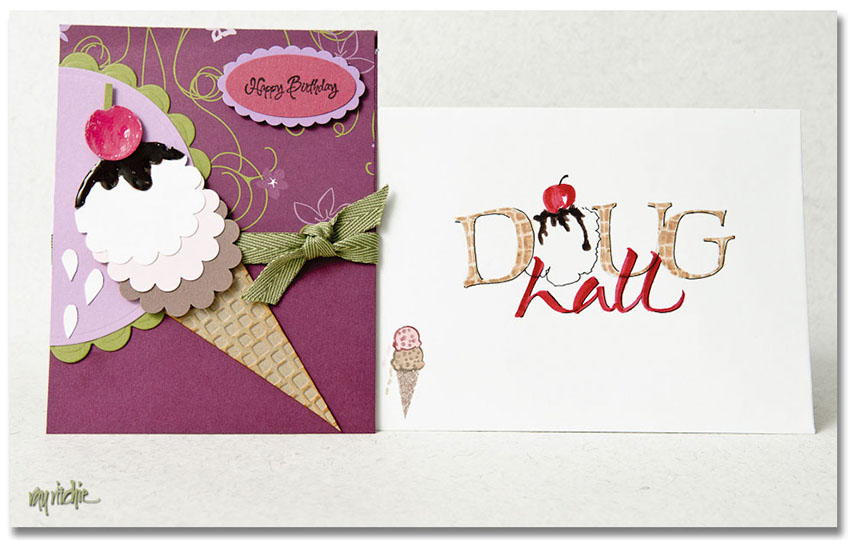
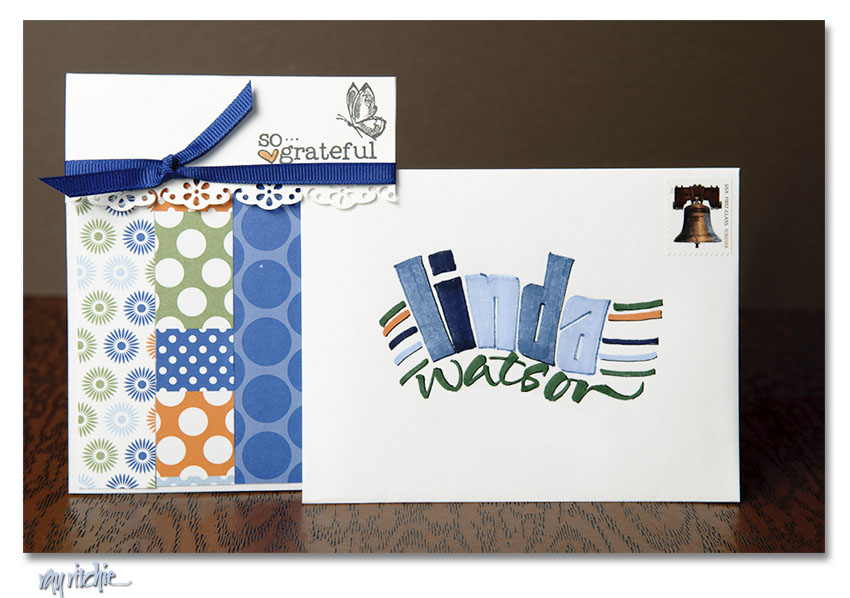
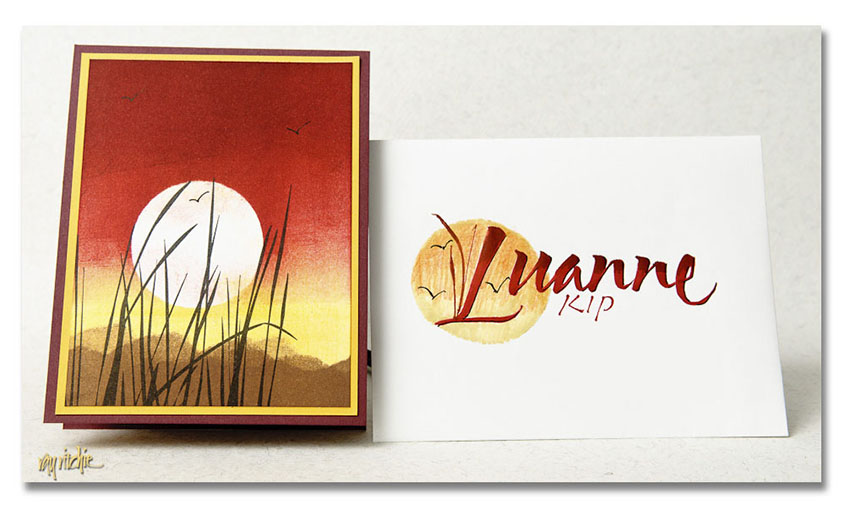
Anita is a dedicated card maker. She must make several hundred cards each year, most of them sent to friends and relatives, but occasionally made for sale or for support of some particular organization she’s involved in. Each of these cards is a fairly elaborate construction, perhaps involving rubber stamping, punched or die-cut elements, embossing, layering of papers and textures, and hand coloring and brayering, just to mention a few of the techniques she sometimes uses. After the card is ready, it usually comes to me for design of a matching or complementary envelope.

These envelopes are good opportunities for me to play with styles and colors and experiment with designs I might not do for my own projects. The envelopes, in contrast to Anita’s carefully worked out designs, are usually only about one step above a doodle. I typically grab a felt-tip brush marker (we have a set of colors that match most of her card stock colors and stamping inks), make some quick sketches on a piece of scrap paper, and then do the envelope. I may use colored pencils, ballpoint pens, and Rapidograph, Pigma, or Uniball pens for some final details and highlighting – whatever is handy at the time. Brush scripts are usually written directly with the marker, and other letter styles are usually drawn with a pencil and then painted in; I rarely go upstairs to my drawing board for my calligraphy pens, gouache, brushes, etc. for casual envelopes like these. Unless I make a major mistake, whatever comes out of the first attempt is what goes in the mail. But it’s fun, and I often like the overall effect. Here are a few recent examples of these collaborations:

Anita asks that I note that the first card above is based on a design by Tami White, the second is based on one by LeeAnn Greff, and the third inspired by a card by Becky Roberts.

More on lettering and calligraphy

To take the exploration of lettering and calligraphy a little further, here are a few examples I’ve been playing with today.

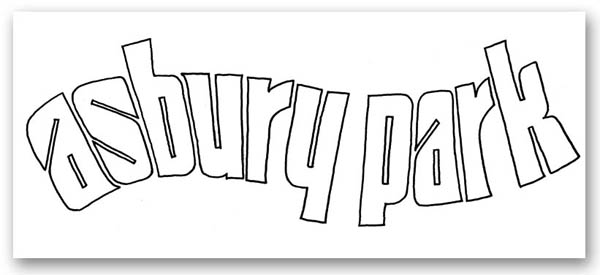
A few weeks ago, I participated in Scott Kelby’s Third Annual Worldwide Photo Walk, an event in which groups of 50 or fewer photographers get together at sites all around the world and take photos for a couple of hours. My local walk was held in Asbury Park, New Jersey (the town where Bruce Springsteen and Jon Bonjovi first made names for themselves as rock musicians). A few of my photos can be seen in my photostream here. Since that time, I’ve been thinking of making some kind of poster, T-shirt, or other graphic with one or more of the photos – but I need some lettering that says “Asbury Park.”

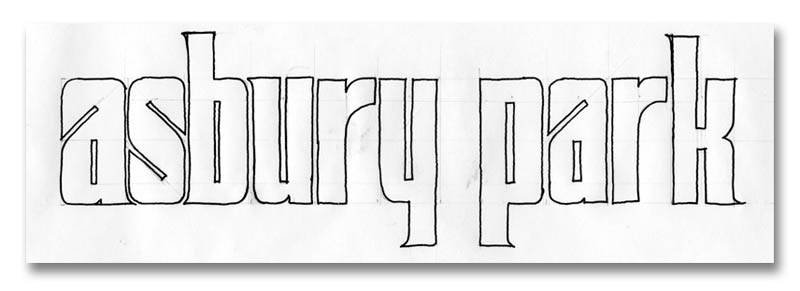
Here’s a sketch for a possible base design, just as it came off my drawing board:

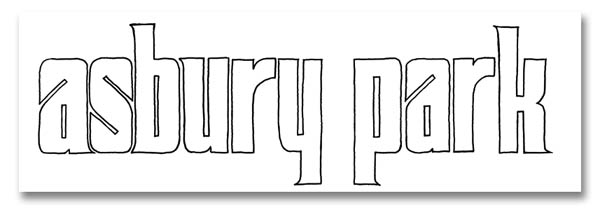
This is a variation of a style of lettering known as “Sickel,” which has been recently discussed on cyberscribes. Note the pencil lines – the design is drawn based on geometric proportions, and then quickly inked in with a pen. After a little cleanup in photoshop, it comes out looking like this:

And if I want to clean it up further and make it easier to enlarge and distort the letters, I can import that drawing into Adobe Illustrator, and trace it with “bezier curves,” which will get rid of all the little bumps and rough spots in my hand drawing. I like this style of letters for this particular application, because 1) it has a “retro” feel that harkens back to the glory days of Asbury Park in the early 20th century, 2) the wide strokes give me lots of room for graphic effects, including using the letters as a mask that my photos will show through, and 3) it lends itself to manipulation and distortion. Here’s an example of that third point:

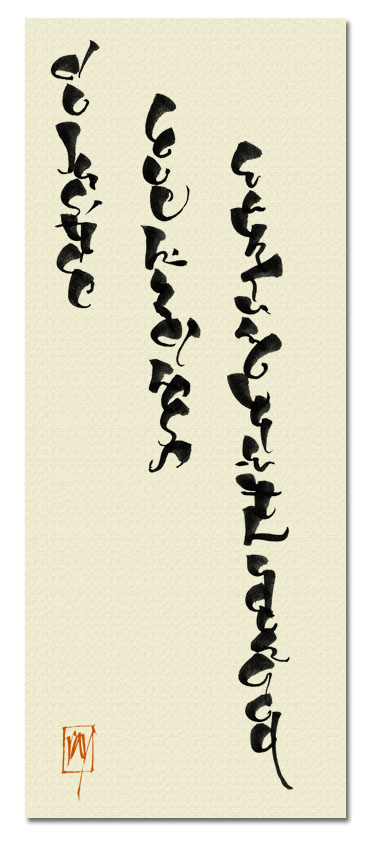
This Asbury Park letter design is an example of what I consider “lettering,” rather than “calligraphy.” It is drawn, rather than written, and will be extensively retouched and manipulated before I reach the final version. As a contrasting example of “calligraphy,” here’s a design based on something I discovered in my inspiration files last night:

This lettering was written with a brush, and I was deliberately playing with the brush characteristics, trying to see if by exaggerating the thicks and thins, and stacking the letters, I could get something that resembled an oriental script. In this case, I haven’t manipulated the original letters at all – I just layered them over a textile background in Photoshop, and added a “chop” in a typical orange-red. The text, in case you can’t read it, is from Micah 6:8: “And what does the Lord require of you, but to do justice, to love kindness, and to walk humbly with your God?”

Next, I’ll try to show an example of using the Asbury Park lettering with a photo.